OPA Authorization with Envoy and JWT-SVIDs
Secure Communication Using Envoy with JWT-SVIDs and Open Policy Agent Authorization
Open Policy Agent (OPA) is an open source, general-purpose policy engine. The authorization provided by OPA (AuthZ) can be a good complement to the authentication that SPIRE offers (AuthN).
This tutorial builds on the SPIRE Envoy-JWT Tutorial to demonstrate how to combine SPIRE, Envoy and OPA to perform JWT SVID authentication and request authorization. The changes required to implement request authorization with OPA are shown here as a delta to that tutorial, so you should run, or at least read through, the SPIRE Envoy-JWT tutorial first.
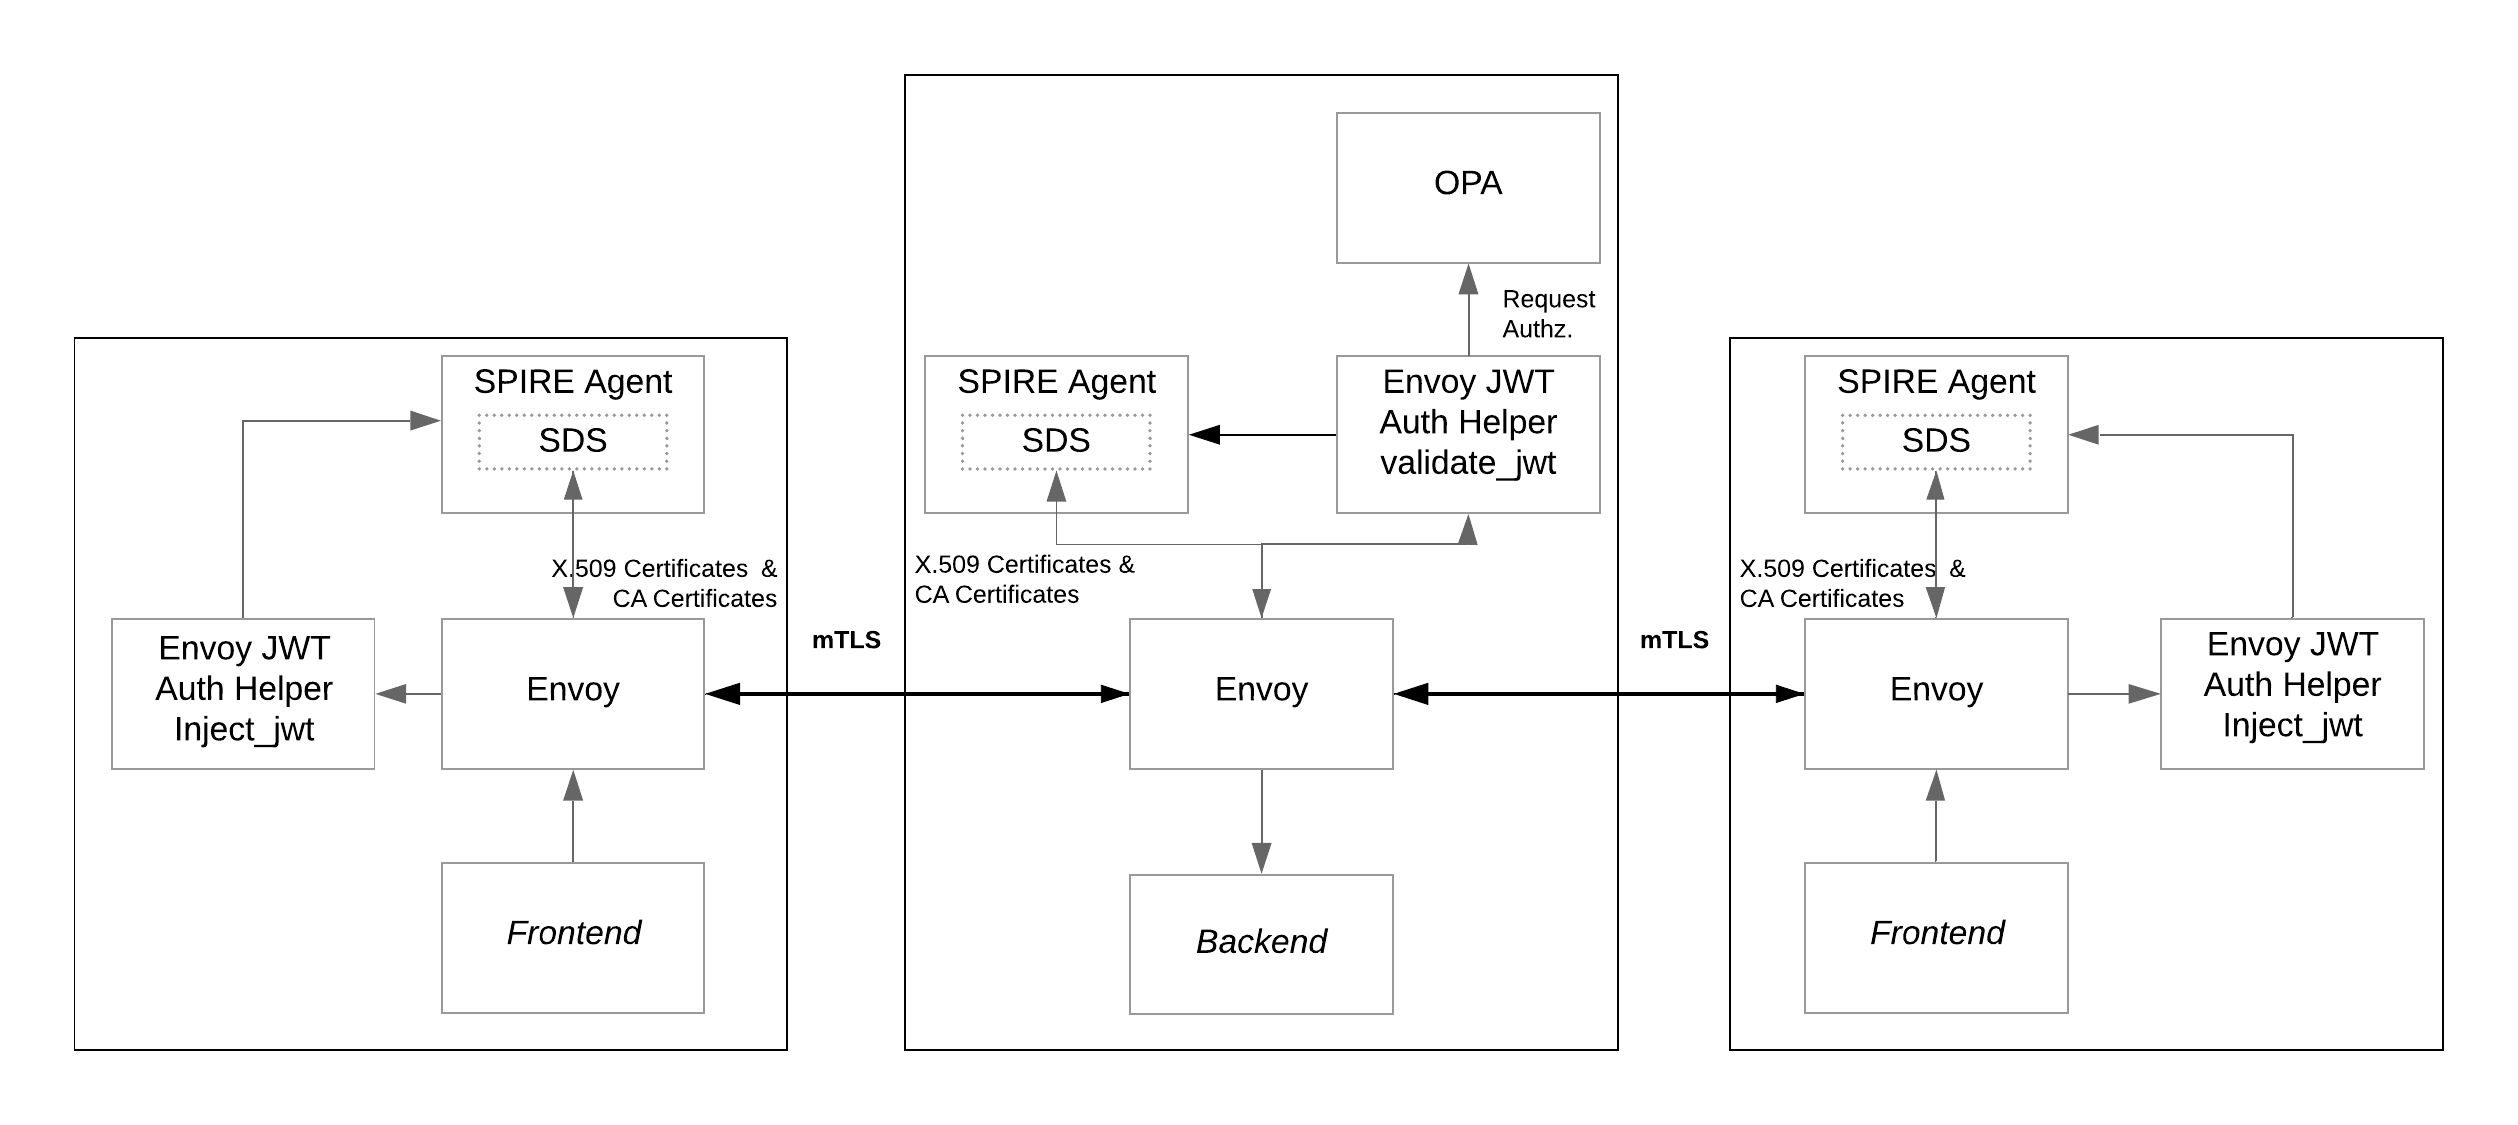
To illustrate request authorization with OPA, we add a new sidecar to the backend service used in the SPIRE Envoy JWT tutorial. The new sidecar acts as a new External Authorization Filter for Envoy.

As shown in the diagram, the frontend services connect to the backend service via an mTLS connection established by the Envoy instances. Envoy sends HTTP requests through the mTLS connections that carry a JWT-SVID for authentication. The JWT-SVID is provided and validated by the SPIRE Agent. Then, requests are authorized or denied by the OPA Agent instance based on security policies.
In this tutorial you will learn how to:
- Add an OPA Agent to the existing backend service from the SPIRE Envoy JWT tutorial
- Add an External Authorization Filter to the Envoy configuration that connects Envoy to OPA
- Test successful JWT authentication using SPIRE plus OPA authorization
Prerequisites
External IP support
This tutorial requires a LoadBalancer that can assign an external IP (e.g., metallb)
$ kubectl apply -f https://raw.githubusercontent.com/metallb/metallb/v0.13.7/config/manifests/metallb-native.yaml
Wait until metallb has started
$ kubectl wait --namespace metallb-system \
                --for=condition=ready pod \
                --selector=app=metallb \
                --timeout=90s
Apply metallb configuration
$ kubectl apply -f ../envoy-x509/metallb-config.yaml
Auth helper image
An External Authorization filter is implemented using Envoy-jwt-auth-helper,
An script is provided to facilitate building and import using kind or minikube
$ bash ./scripts/build-helper.sh kind
Previous SPIRE instalation
Before proceeding, review the following:
- You’ll need access to the Kubernetes environment configured when going through the SPIRE Envoy-JWT Tutorial. Optionally, you can create the Kubernetes environment with the
pre-set-env.shscript described just below. - Required YAML files for this tutorial can be found in the
k8s/envoy-jwt-opadirectory in https://github.com/spiffe/spire-tutorials. If you didn’t already clone the spire-tutorials repository please do so now.
If the Kubernetes Configure Envoy to Perform JWT SVID Authentication tutorial environment is not available, you can use the following script to create it and use it as starting point for this tutorial. From the k8s/envoy-jwt-opa directory, run the following Bash script:
$ bash scripts/pre-set-env.sh
The script will create all the resources needed for the SPIRE Server and SPIRE Agent to be available in the cluster and then will create all the resources for the SPIRE Envoy JWT tutorial, which is the base scenario for this SPIRE Envoy JWT with OPA Tutorial.
Note: The configuration changes needed to enable Envoy and OPA to work with SPIRE are shown as snippets in this tutorial. However, all of these settings have already been configured. You don’t have to edit any configuration files.
Part 1: Deploy Updated and New Resources
Assuming the SPIRE Envoy JWT Tutorial as a starting point, there are some resources that need to be created.
The goal is to have the requests authorized by the OPA Agent before hitting the backend service. There is an mTLS connection established between Envoy instances where JWT SVIDs are transmitted in requests as authorization headers. So the missing part is to add an OPA Agent to authorize requests based on policies.
The solution applied in this tutorial consists of adding a new External Authorization Filter to the Envoy instance running in front of the backend service. The new filter invokes the OPA Agent after the request passes through the Envoy JWT Auth Helper (the first filter) and its job is to check whether the request should be authorized or denied.
Update Deployments
In order to let OPA authorize or reject requests coming to the backend service it is necessary to add OPA as a sidecar to the deployment.
We use the openpolicyagent/opa:0.50.2-envoy image which extends OPA with a gRPC server that implements the Envoy External Authorization API so OPA can communicate policy decisions with Envoy. The new container is added and configured as follows in backend-deployment.yaml:
- name: opa
  image: openpolicyagent/opa:0.50.2-envoy
  imagePullPolicy: IfNotPresent
  ports:
    - name: opa-envoy
      containerPort: 8182
      protocol: TCP
    - name: opa-api-port
      containerPort: 8181
      protocol: TCP
  args:
    - "run"
    - "--server"
    - "--config-file=/run/opa/opa-config.yaml"
    - "/run/opa/opa-policy.rego"
  volumeMounts:
    - name: backend-opa-policy
      mountPath: /run/opa
      readOnly: true
The ConfigMap backend-opa-policy needs to be added into the volumes section, like this:
- name: backend-opa-policy
  configMap:
    name: backend-opa-policy-config
The ConfigMap backend-opa-policy provides two resources, opa-config.yaml described in OPA Configuration and the opa-policy.rego policy explained in the OPA Policy section.
OPA Configuration
For this tutorial we create the following OPA configuration file in opa-config.yaml:
decision_logs:
   console: true
plugins:
   envoy_ext_authz_grpc:
      addr: :8182
      query: data.envoy.authz.allow
The option decision_logs.console: true forces OPA to log the decisions locally at info level to the console. Later on in the tutorial we’ll use these logs to examine the results for different requests.
Next, let’s review the configuration for the envoy_ext_authz_grpc plugin. The addr key sets the listening address for the gRPC server that implements the Envoy External Authorization API. This must match the value configured in the Envoy Filter resource detailed in a following section.
The query key defines the name of the policy decision to query. The next section focuses on details of the envoy.authz.allow policy specified for the query key.
OPA Policy
OPA policies are expressed in a high-level declarative language called Rego. For this tutorial we created a sample rule named allow that includes three expressions (see opa-policy.rego). All the expressions must evaluate to true for the rule to be true.
package envoy.authz

default allow = false

allow {
    valid_path
    http_request.method == "GET"
    svc_spiffe_id == "spiffe://example.org/ns/default/sa/default/frontend"
}
Let’s take a look at each expression individually. valid_path is a user-defined function created to ensure that only requests sent to permitted resources are allowed.
import input.attributes.request.http as http_request

valid_path {
   glob.match("/balances/*", [], http_request.path)
}

valid_path {
   glob.match("/profiles/*", [], http_request.path)
}

valid_path {
   glob.match("/transactions/*", [], http_request.path)
}
The function valid_path makes use of the built-in function glob.match( _pattern, delimiters, match_) the output of which is true if match can be found in pattern which is separated by delimiters. Then, to express logical OR in Rego you define multiple rules with the same name. That is why there are three definitions of valid_path, one per valid resource.
The following expression defines that the HTTP method of the request must be equal to GET:
http_request.method == "GET"
The last expression corresponds also to a user-defined function that will be true only when the SPIFFE ID encoded in the JWT-SVID is equal to the SPIFFE ID assigned to the frontend service.
svc_spiffe_id == "spiffe://example.org/ns/default/sa/default/frontend"
The function svc_spiffe_id extracts the SPIFFE ID of the service from the authorization header in the request. Because the request has already passed through the first Envoy filter (Envoy JWT Auth Helper running in validate mode) we know it has a valid JWT that we can decode to extract the SPIFFE ID of the caller service.
OPA provides an special-purpose code for dealing with JWTs that we can leverage to decode the JWT and extract the SPIFFE ID:
svc_spiffe_id = payload.sub {
   [_, encoded_token] := split(http_request.headers.authorization, " ")
   [_, payload, _] := io.jwt.decode(encoded_token)
}
Consequently, the policy will evaluate to true only when the request is sent to a valid resource (/balances/, /profiles/ or /transactions/) with a GET method and the request comes from a workload authenticated with the SPIFFE ID equal to spiffe://example.org/ns/default/sa/default/frontend. In all other cases, the request is not authorized by OPA and so is rejected by Envoy.
Add a New External Authorization Filter to Envoy
Envoy needs to know how to contact the OPA Agent just configured to perform the authorization of every request. To complete the setup, we add a new filter of type External Authorization Filter to the http_filters section of the Envoy configuration as shown below:
- name: envoy.filters.http.ext_authz
  typed_config:
    "@type": type.googleapis.com/envoy.extensions.filters.http.ext_authz.v3.ExtAuthz
    with_request_body:
      max_request_bytes: 8192
      allow_partial_message: true
   failure_mode_allow: false
   transport_api_version: V3
   grpc_service:
      google_grpc:
        target_uri: 127.0.0.1:8182
        stat_prefix: ext_authz
      timeout: 0.5s
The configuration tells Envoy to contact the OPA Agent at 127.0.0.1 on port 8182. This matches the configuration for OPA explained in the OPA Configuration section.
Apply the New Resources
Ensure that the current working directory is .../spire-tutorials/k8s/envoy-jwt-opa and deploy the new resources using:
$ kubectl apply -k k8s/.

configmap/backend-envoy configured
configmap/backend-opa-policy-config created
deployment.apps/backend configured
For the new configurations to take effect, the backend service need to be restarted. Run the following two commands to force the restart:
$ kubectl scale deployment backend --replicas=0
$ kubectl scale deployment backend --replicas=1
Part 2: Test Connections
Now that services are updated and deployed, let’s test the authorization that we’ve configured.
Testing Valid Requests
The first test will demonstrate how a request that satisfies the policy allows for the display of associated data. To run this test, we need to find the IP address and port that make up the URL to use for accessing the data.
$ kubectl get services

NAME            TYPE           CLUSTER-IP    EXTERNAL-IP      PORT(S)          AGE
backend-envoy   ClusterIP      None            <none>           9001/TCP         5m56s
frontend        LoadBalancer   10.96.194.108   172.18.255.200   3000:30824/TCP   5m56s
frontend-2      LoadBalancer   10.96.61.216    172.18.255.201   3002:31960/TCP   5m56s
kubernetes      ClusterIP      10.96.0.1       <none>           443/TCP          14m
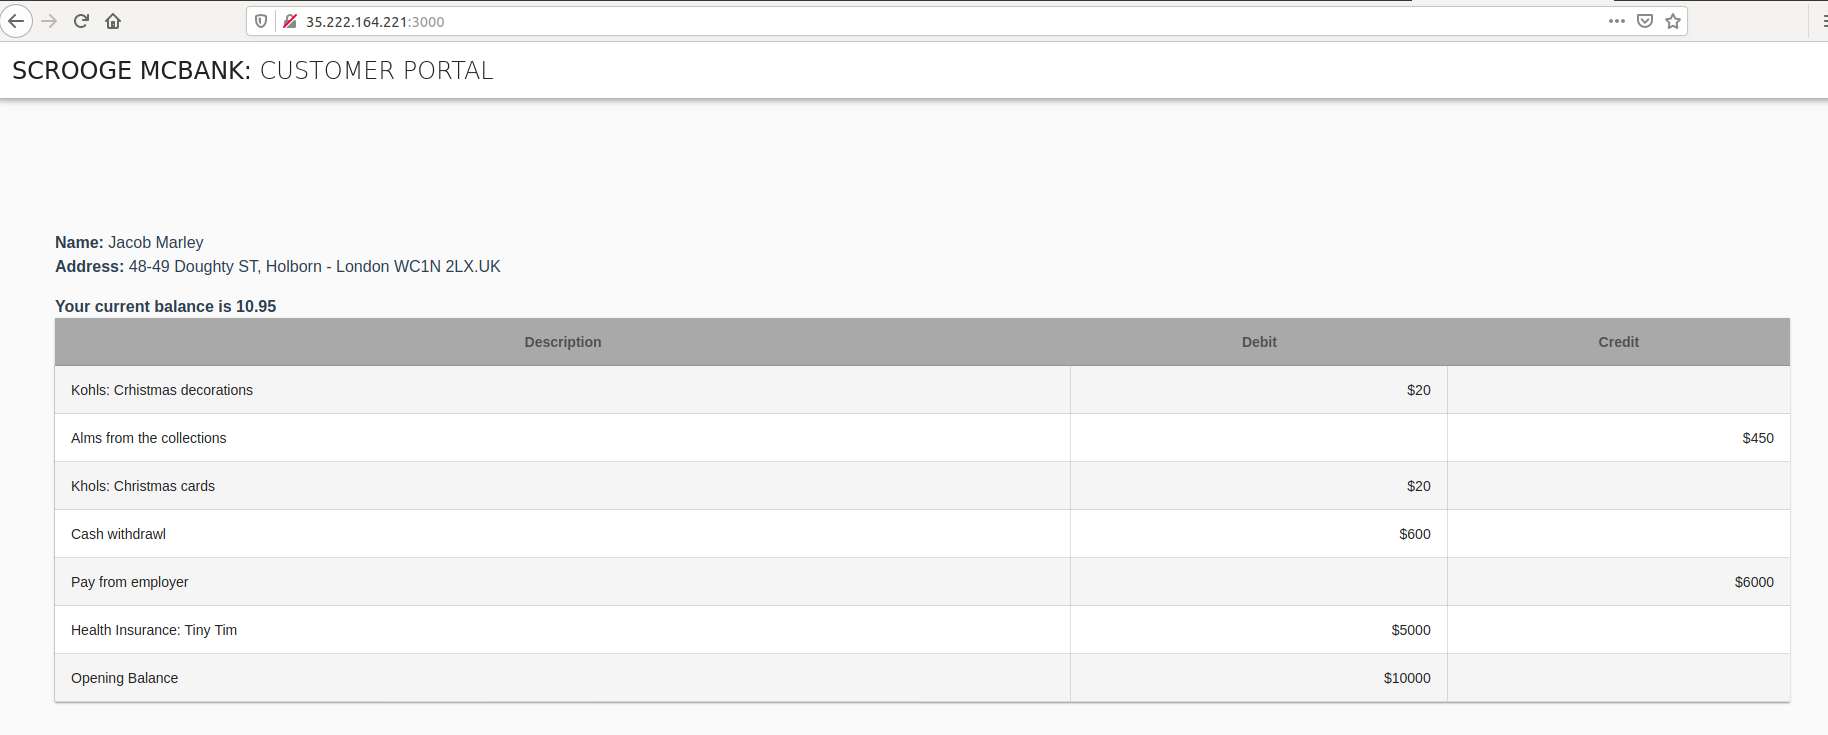
The frontend service will be available at the EXTERNAL-IP value and port 3000, which was configured for our container. In the sample output shown above, the URL to navigate to is http://172.18.255.200:3000. Open your browser and navigate to the IP address shown for frontend in your environment, adding the port :3000. Once the page is loaded, you’ll see the account details for user Jacob Marley.

Let’s take a look at the OPA Agent logs to see what is happening behind the scenes. Use the following Bash script to get the logs for the OPA instance running next to the backend service and process the output with jq:
$ bash scripts/backend-opa-logs.sh
The output shows the decision made for each request. For example, a request to the frontend service could produce a log entry similar to the following:
{
  "decision_id": "96ed5a6c-c2d3-493a-bdd2-bf8b94036bfb",
  "input": {
    "attributes": {
      ...
      "request": {
        "http": {
          "headers": {
            ":authority": "localhost:3001",
            ":method": "GET",
            ":path": "/transactions/1",
            "accept-encoding": "gzip",
            "authorization": "Bearer eyJhbGciOiJSUzI1NiIsImtpZCI6ImU2d3JsNkw3Nm5HS3VVVDlJdVhoVEpFbFVIaExSZFJrIiwidHlwIjoiSldUIn0.eyJhdWQiOlsic3BpZmZlOi8vZXhhbXBsZS5vcmcvbnMvZGVmYXVsdC9zYS9kZWZhdWx0L2JhY2tlbmQiXSwiZXhwIjoxNTk0MjM5NzQ3LCJpYXQiOjE1OTQyMzk0NDcsInN1YiI6InNwaWZmZTovL2V4YW1wbGUub3JnL25zL2RlZmF1bHQvc2EvZGVmYXVsdC9mcm9udGVuZCJ9.YiS52Y44iOGgaRPcXmhm_FRHgjGIPknx3HqHvVsQNiQw4uJx3eICPECQqTpFOh3flEqvDizlpehipHHdhKEy8TvZtJRnPQ69Jofce4aCx5wF0KQtOBZ79bx9H0Y0gcWWzIDb3YW3uNVfZnHvojlLnzqJb3axIhAqgNbURmlm4STTISxJxNzYcr24Zio6uTYSEJmLtQlFVShhUUQr0zFyj_tbyc9RRcX3MNWLFrkWS8eVIQvkvKBO2zYt2FA0GACBnSFDcR6u2G-5QCU7mzlOnqCrMZ6q4aaRp86v33fYbKZKSfghfcmAeOKc-aai92sTlSPSpWnv5qLKIs6GpT6H7A",
            "content-length": "0",
            "user-agent": "Go-http-client/1.1",
            "x-forwarded-proto": "http",
            "x-request-id": "fad45df6-3cc1-4ce9-9cad-fb3b65eff037"
          },
          "host": "localhost:3001",
          "id": "10476077497628160603",
          "method": "GET",
          "path": "/transactions/1",
          "protocol": "HTTP/1.1"
        },
      ...
      },
      ...
    },
    ...
  },
  ...
  },

  "msg": "Decision Log",
  "query": "data.envoy.authz.allow",
  "requested_by": "",
  "result": true,
  "time": "2020-07-08T20:17:27Z",
  "timestamp": "2020-07-08T20:17:27.7568234Z",
  "type": "openpolicyagent.org/decision_logs"
}
Note the presence of the authorization header containing the JWT. As explained in the OPA Policy section, this JWT is decoded using the special-purpose code provided by OPA for dealing with JWTs and then the SPIFFE ID is extracted. As we already know, the SPIFFE ID for the frontend service matches the SPIFFE ID defined in the Rego policy configured for the OPA Agent. Furthermore, request’s path and method also match the rule so the result for the decision is true and the request is allowed to pass through the filter and reach the backend service.
Testing Invalid Requests
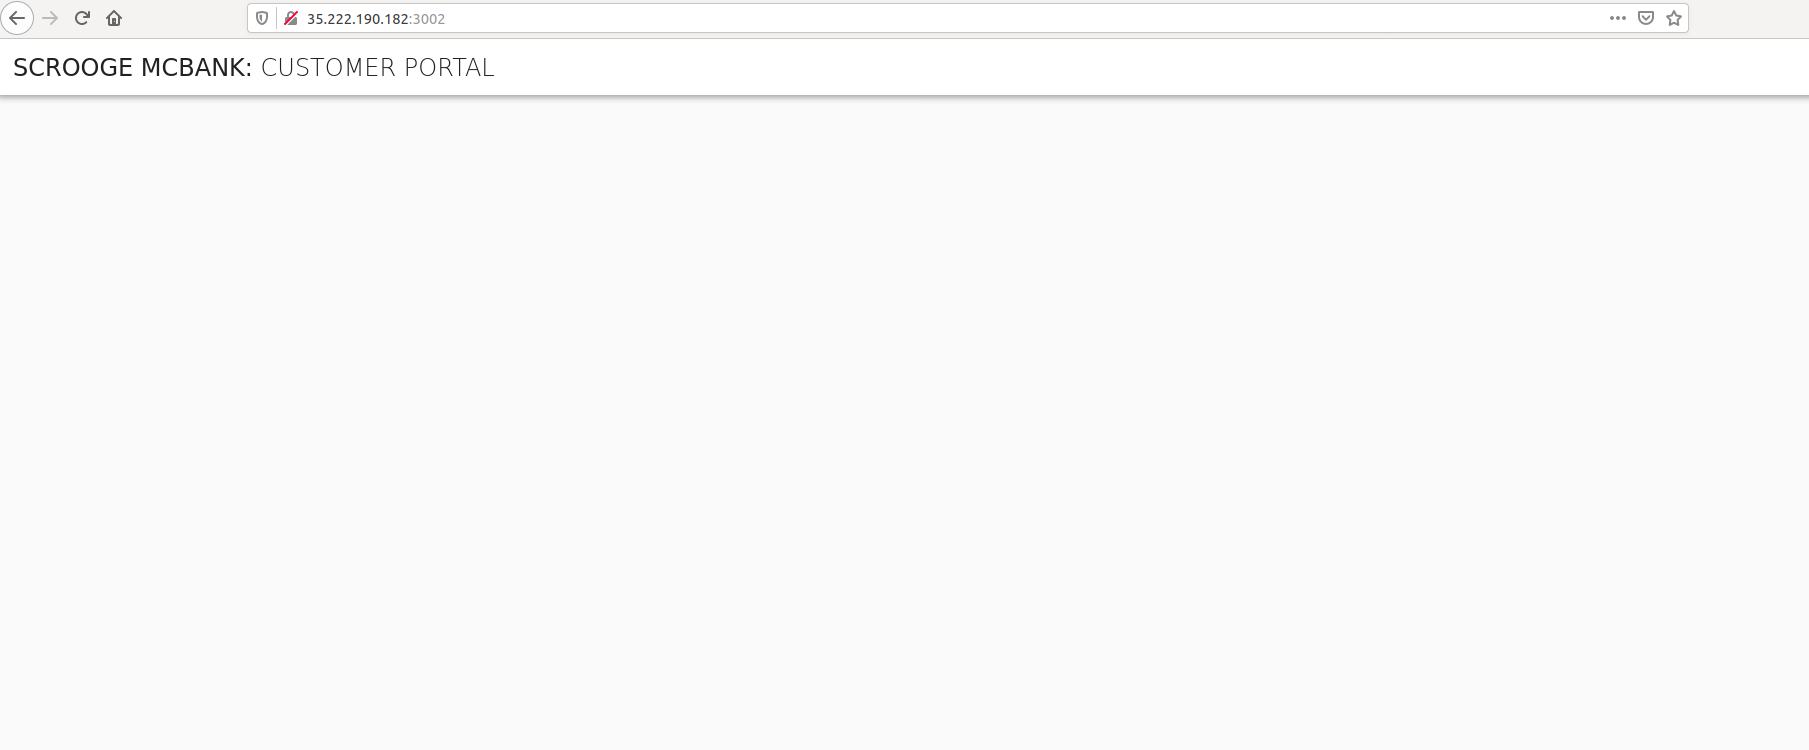
On the other hand, when you connect to the URL for the frontend-2 service (e.g. http://172.18.255.201:3002), the browser only displays the title without any account details. This is because the SPIFFE ID of the frontend-2 service (spiffe://example.org/ns/default/sa/default/frontend-2) does not satisfy the policy for the OPA Agent.

After trying to display the frontend-2 data, you can verify the decision made by OPA using the same scripts/backend-opa-logs.sh script as performed in the previous section. A similar log entry is available for the frontend-2 service but with the result equal to false due to the SPIFFE ID mismatch.
Retesting frontend-2 with a New Policy
Let’s update the Rego policy to match the SPIFFE ID of the frontend-2 service and test again. There is a Bash script that you can leverage to complete this task. Once executed, it will open the editor defined by your KUBE_EDITOR, or EDITOR environment variables, or fall back to vi for Linux or Notepad for Windows.
$ bash scripts/backend-update-policy.sh
With the editor open, look for the following line that specifies the SPIFFE ID to be matched by the rule:
svc_spiffe_id == "spiffe://example.org/ns/default/sa/default/frontend"
Update that line to match the SPIFFE ID for the frontend-2 service:
svc_spiffe_id == "spiffe://example.org/ns/default/sa/default/frontend-2"
Save the changes and exit. The backend-update-policy.sh script resumes. The script applies new version of the ConfigMap and then restarts the backend pod to pick up the new rule.
Wait some seconds for the deployment to propagate before trying to view the frontend-2 service in your browser again.
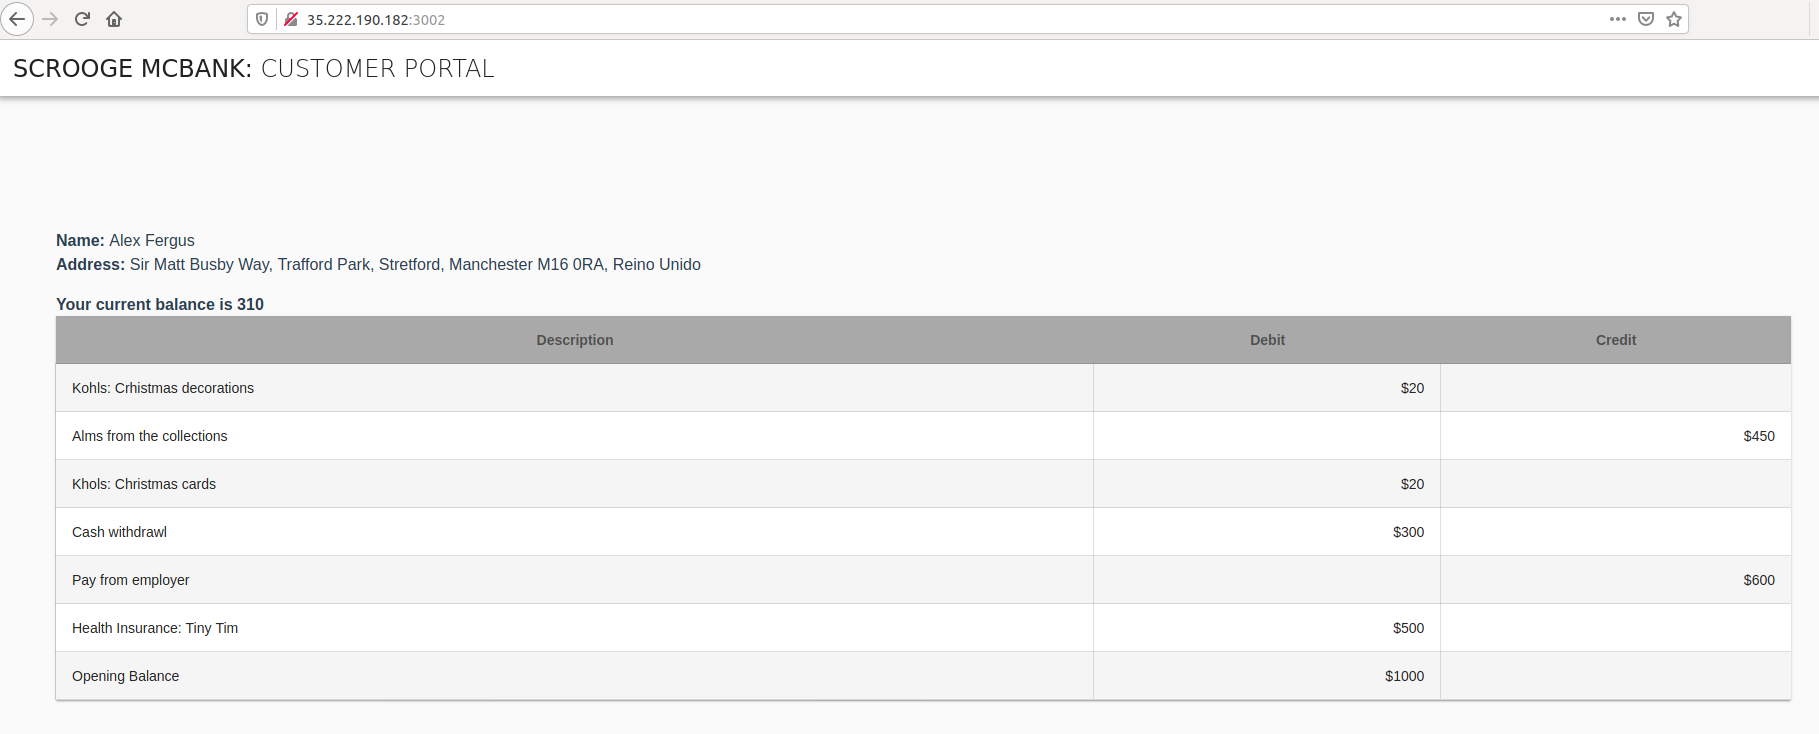
Once the pod is ready, refresh the browser using the correct URL for the frontend-2 service (e.g. http://172.18.255.201:3002). As a result, now the page shows the account details for user Alex Fergus.

On the other hand, if you now connect to the URL for the frontend service (e.g. http://172.18.255.200:3000), the browser only displays the title without any account details. This is the expected behaviour as the policy was updated and now the SPIFFE ID of the frontend service does not satisfy the policy anymore.
Cleanup
When you are finished, you can use the following commands to clean the environment created for the tutorial. It will remove:
- All resources created for this SPIRE - Envoy JWT with OPA integration tutorial
- All resources created for the SPIRE - Envoy JWT integration tutorial
- All deployments and configurations for the SPIRE Agent, SPIRE Server, and namespace
$ bash scripts/clean-env.sh
